


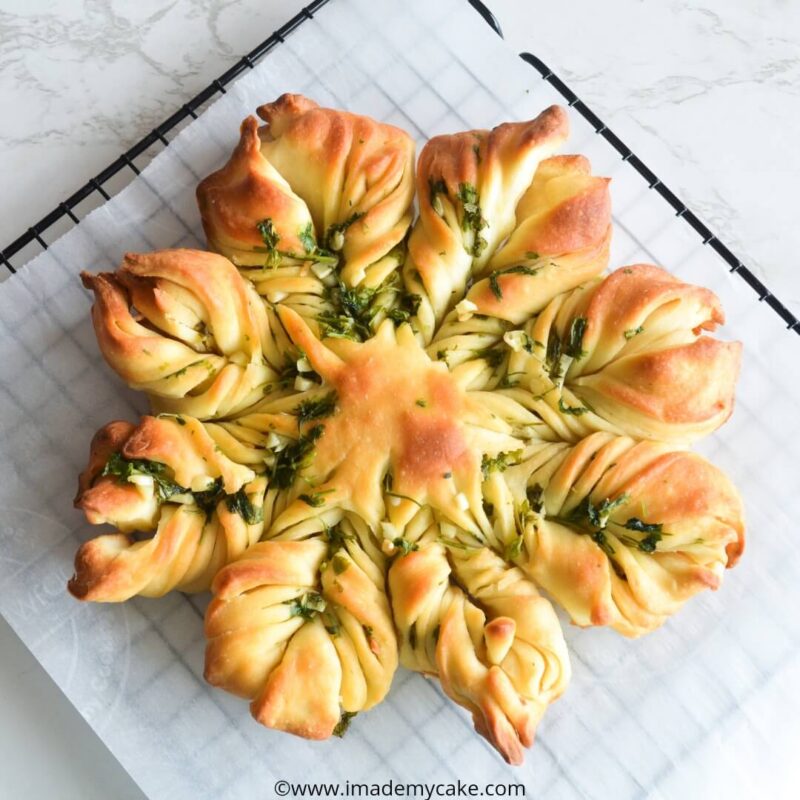
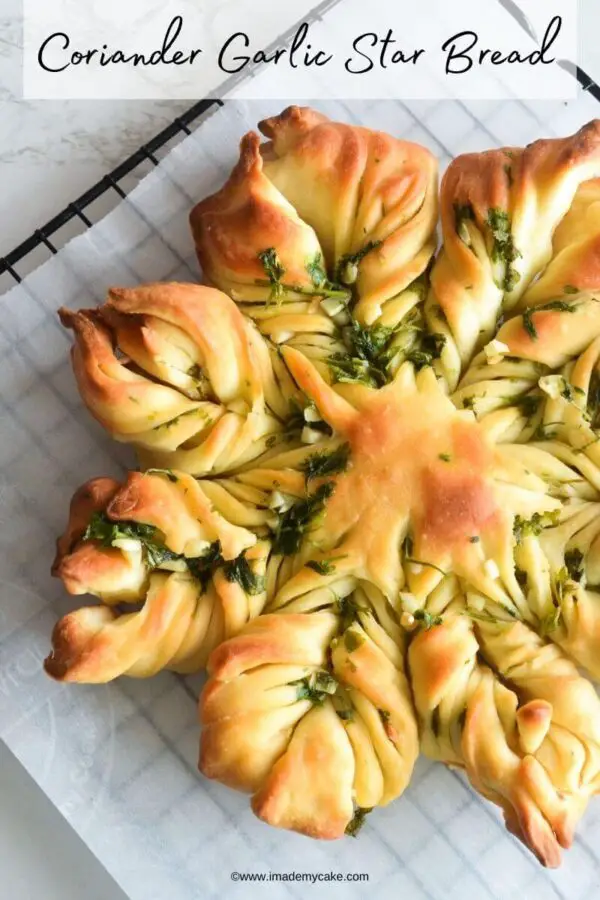
Coriander Garlic Star Bread
A buttery rich delicious garlic bread with a lovely flavour of coriander.
In this post, I’m going to share with you an amazing Star Bread recipe that you would love to make frequently and which will become your favourite snack.
This bread recipe is simple once you understand the shaping process. It is made with easily available ingredients which makes it suitable for baking frequently.
Let’s get started!
Ingredients for Coriander Garlic Star Bread
We need the below ingredients to make this bread:
- All-purpose Flour: Avoid substituting this for whole-wheat flour as you will not get the same texture with whole-wheat flour as the protein content in whole-wheat flour is more.
- Yeast: I have used instant dry yeast for making this bread which can be added directly to the flour without making it bloom separately.
- Sugar and Salt: Do not skip both of these ingredients. Sugar is important to bring the yeast to life and salt is important as this is a savoury bread.
- Milk: The hydrating ingredient that I have used for this recipe is milk. Also, this recipe uses 75% hydration.
- Coriander: Use fresh or leftover coriander for making the filling. This recipe is forgiving even if you use leftover coriander. You may modify the quantity as per your choice. I have used around 8-10 sprigs of coriander leaves.
- Garlic Cloves: The more the better! That is what I feel about using garlic in savoury dishes. I have used around 20 garlic cloves for this recipe.
- Salted Butter: Salted butter gives a nice flavour to this savoury bread. You may use unsalted butter too but I would recommend adding little salt to the butter-coriander-garlic mixture so that the taste is not compromised.
Step by step Instructions
- Measure the flour. Add yeast, salt and sugar. Finally add the milk and make a dough.

2. Transfer the dough to a counter space dusted with flour. The dough will be a bit tight but do not add more water or milk.
Take 1 tablespoon of butter and start kneading the dough with the base of your palm so that the butter is incorporated well in the dough.
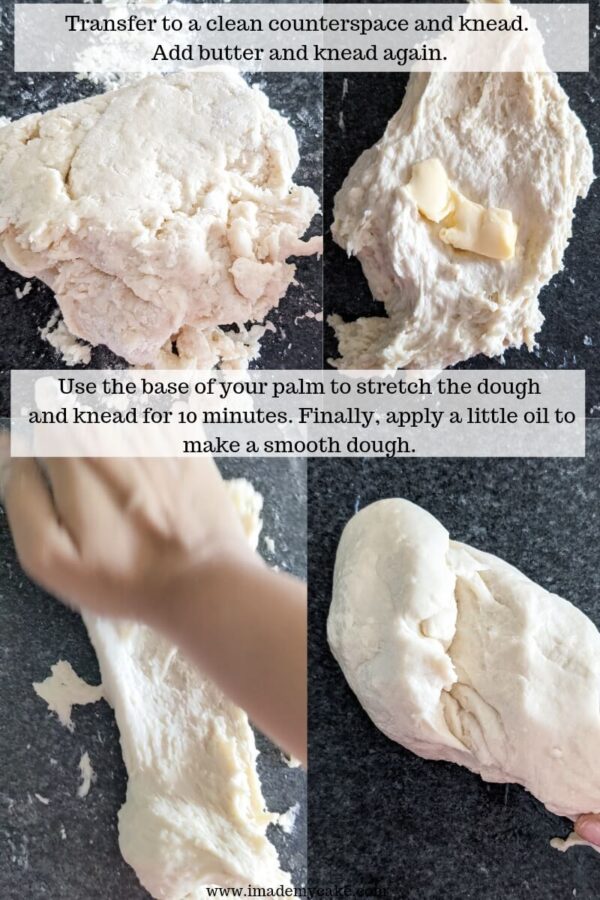
Knead for 10 minutes. You will find this activity relaxing. There is no need to apply extra pressure on the dough and your hand will not pain if you knead it properly. Just use the base of your palm.
Finally add half a teaspoon of oil to the dough to make it smooth. Brush a large bowl with oil and place this dough in it for the first proofing.
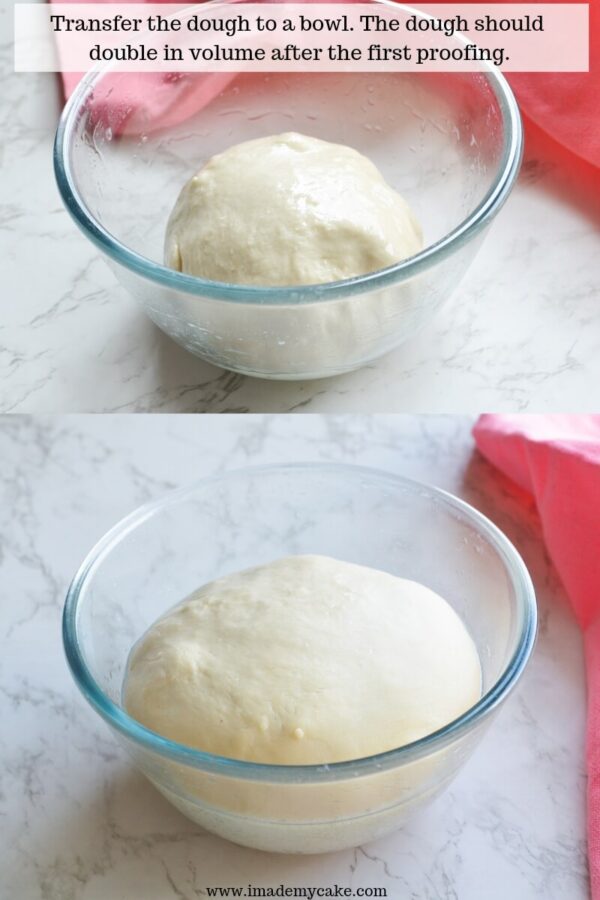
The weather in Bangalore was around 22°C when I made this dough and it took around 2 hours for this to finish it’s first proofing and double in volume. If you are making this bread in a warmer weather, the first proofing will finish quicker so you will need to keep an eye around the one hour mark.
How to shape the Coriander Garlic Star Bread?
Shaping this bread is easy if you understand the process first.
- We are going to make 4 layers of bread dough.
- Then, we are going to fill them with the coriander-garlic and butter mixture.
- Finally, we will make cuts and shape the bread.
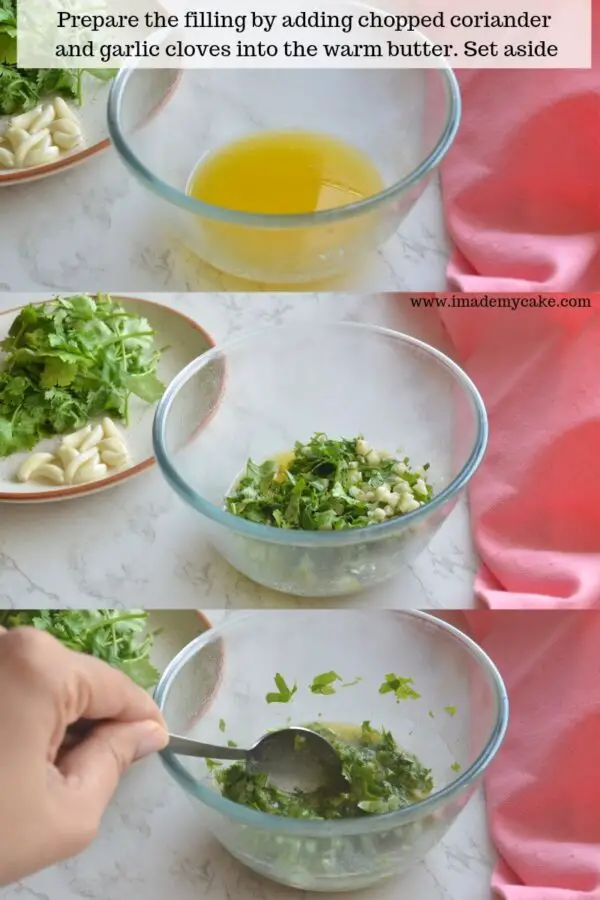
So first, prepare the filling which is very simple and quick. Just melt the butter and add the chopped coriander and garlic cloves while the butter is still warm. This helps the flavours blend well.
Line a baking tray with parchment paper. We are going to shape the bread on the parchment paper only as it will be difficult to transfer the shaped bread to the baking tray later.
1. Now that the dough is divided in 4 parts, start rolling each dough ball in to circles of 5-6 inches in diameter.
Place one circle on the parchment paper and spread a heaping spoonful of the butter-coriander-garlic mixture.
Do not spread the filling on the outer 1 cm of the circle as we need to press them together.
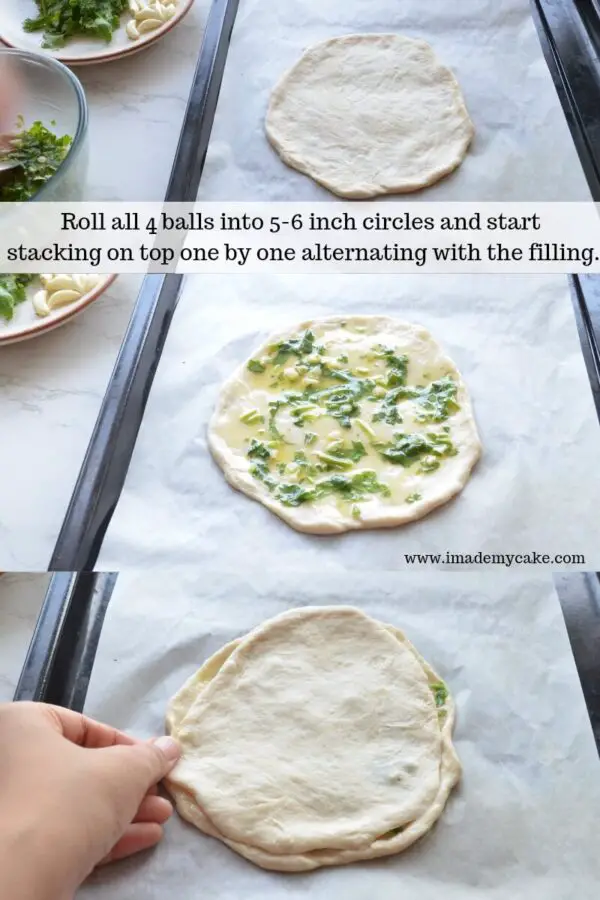
2. Place the second circle and press on all sides so that both circles stick together. My second circle was a little smaller than the first one. To avoid this, you can measure it with a scale or tape so that all circles are same in diameter.
3. Next, again spread some filling on the second circle. Repeat the same process for all circles. Save some butter-coriander-garlic mixture for the last step i.e., brushing the bread post baking.
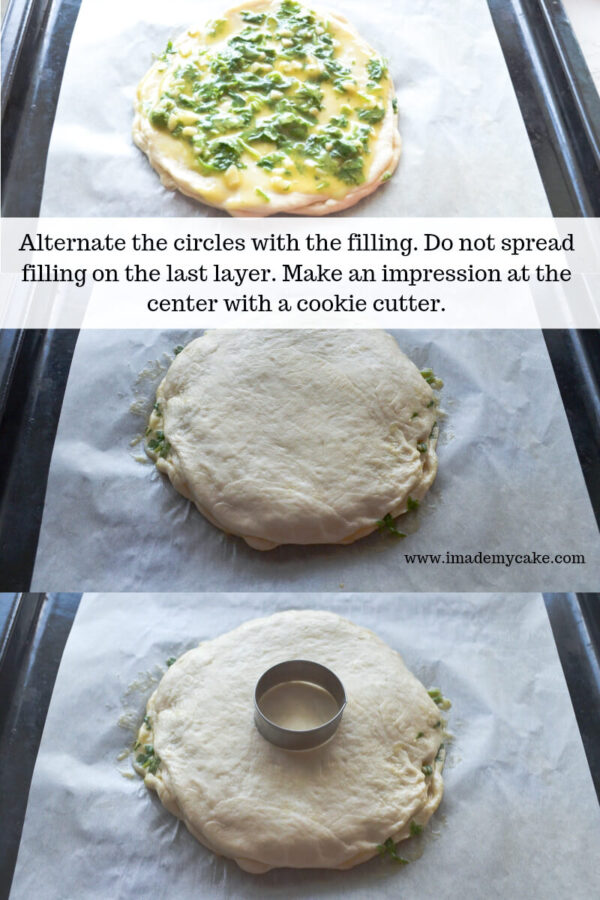
Use a 1 or 1.5 inch cookie cutter or a small bowl which can make an impression at the center. This will be a guide to make further “cuts” for shaping the bread.
Now the base is ready.
Let’s see how to make the petals of this bread.
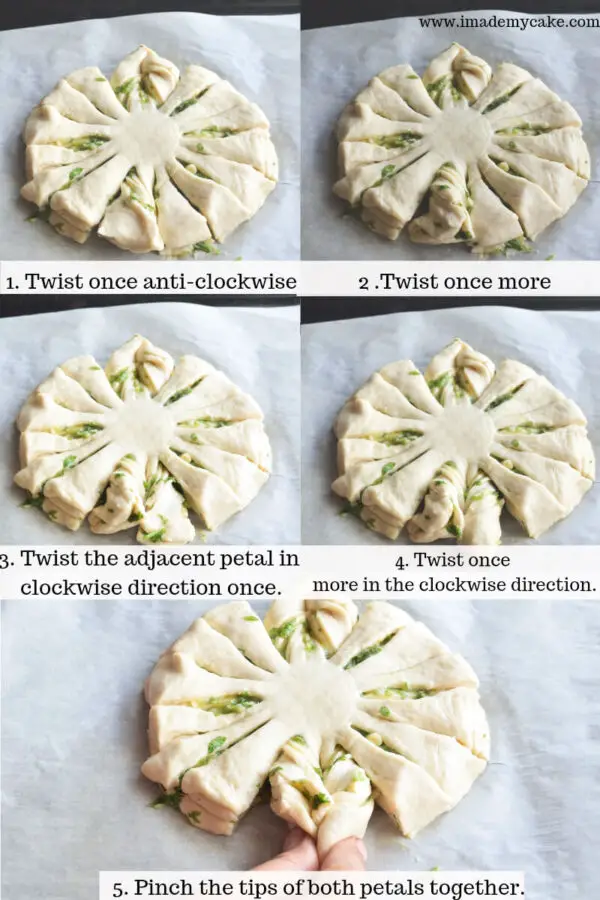
4. Make 4 cuts as shown in the image below dividing the bread in 4 “sections”.
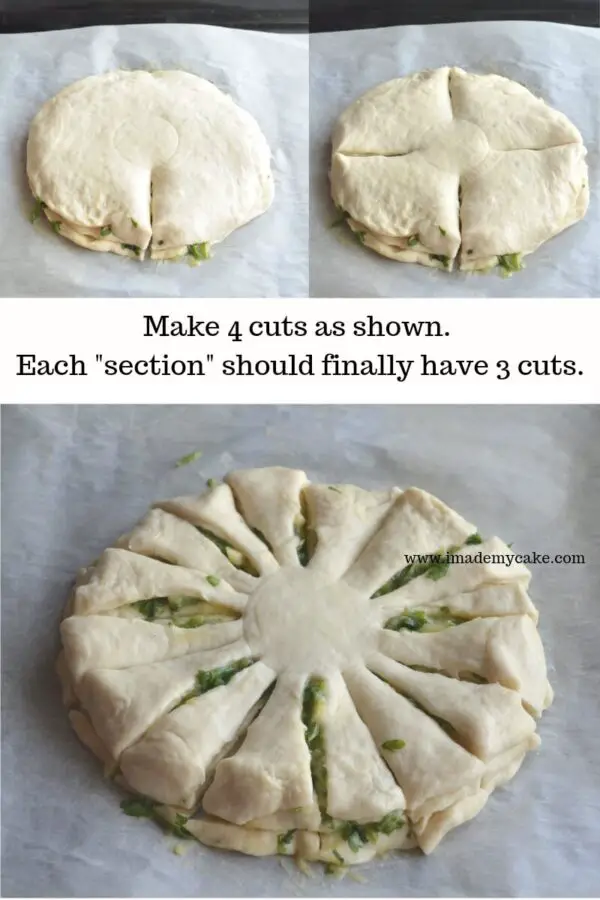
2. Each section should have 3 cuts or 4 petals that are equal in size. We need to combine petal pairs in to one (2 petals into 1 petal) which will be the final petals.
3. First, we need to work with each petal. Lift one petal and turn it anticlockwise two times. The adjacent petal on the right to this is the partner petal. You will twist the partner petal twice but in the clockwise direction. Then, pinch both petals at the tip to form one petal. Repeat for all petal pairs to get the final design.
4. Let this rest for 10 minutes. You can consider it as second proofing. After 10 minutes, start preheating the oven at 180° C for 10 minutes.
In this way, the dough gets a total of 20 minutes to rest. 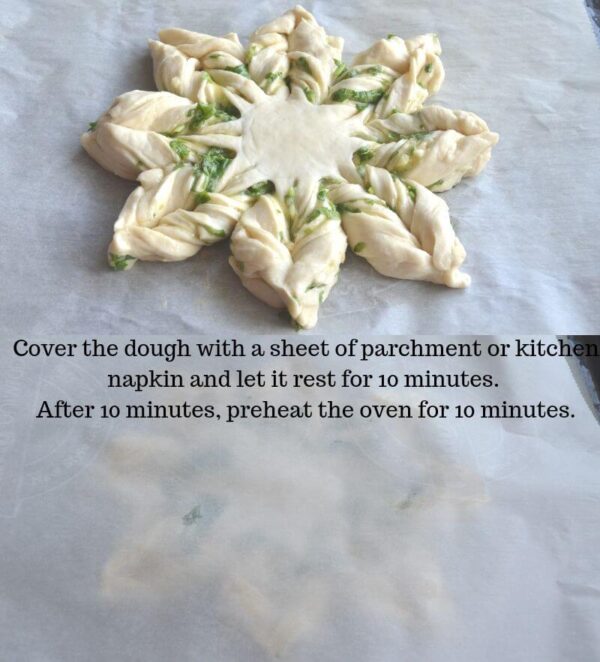
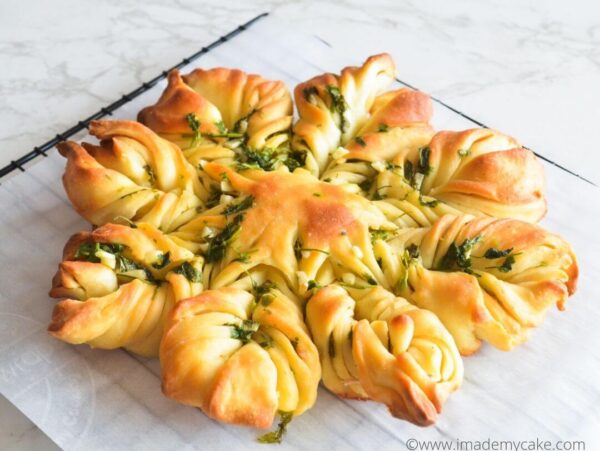
Bake this bread for 20-25 minutes at 180° C with both rods on if you are using an OTG. You may optionally brush it with milk before baking. I found the result was fine without the brushing too.
Once out of the oven, brush it with the remaining butter-coriander-garlic mixture and let it cool down for 10 minutes before serving.
The picture of my bread that you see is browned on the top and edges which gave it a toasty and crispy texture. If you like it soft, bake it only for 20 minutes.
Coriander Garlic Star Bread Recipe
Coriander Garlic Star Bread
Ingredients
- 250 grams All-purpose Flour
- 1 teaspoon Instant Dry Yeast
- 1 teaspoon Table Salt (adjust according to taste)
- 1 teaspoon Powdered White Sugar (for making the yeast bloom, do not skip)
- 185 ml Milk
- 1 tablespoon Butter (use either salted/unsalted)
Coriander Garlic filling
- 40 grams Salted Butter
- 20 Garlic Cloves (medium sized)
- Handful Coriander leaves/Cilantro
Instructions
- Start by preparing the dough. Mix together flour, yeast, sugar, salt and milk. Knead to make a firm dough.
- Transfer the dough to a clean kitchen counter. Dust the counter with some flour before you transfer.
- Start kneading and pressing on the dough from the center in the upward direction with the help of the base of your palm. This will help generate the gluten quickly.
- Knead the dough for 10 minutes. Let it rest for at least 1 hour 30 minutes or until it doubles in volume. This is the first proofing of the dough.
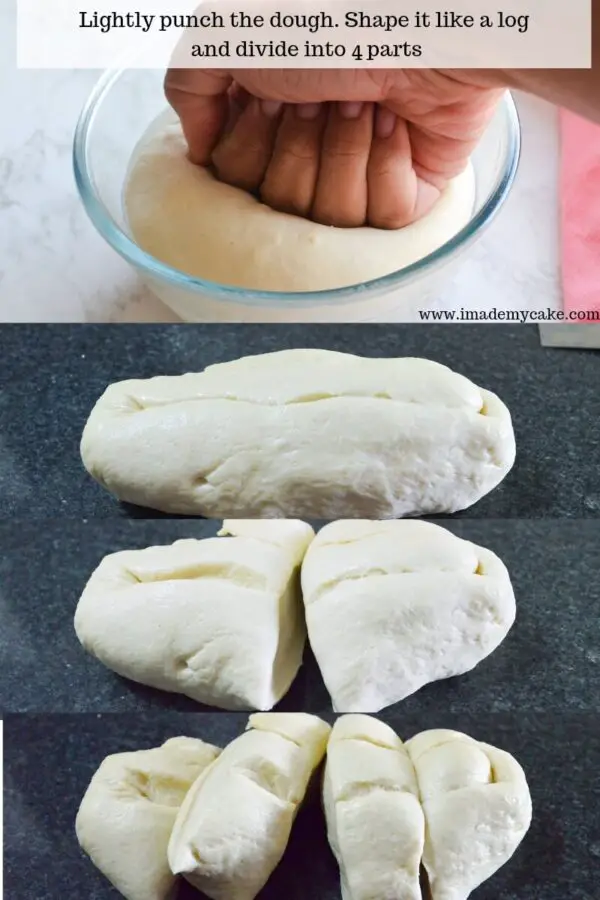
- Once the dough has doubled, punch it lightly to release all the air inside. You do not need to knead the dough now.
Making the filling
- Measure the butter and heat it lightly. Until it heats, chop coriander leaves and garlic cloves finely.
- Add the coriander leaves and cloves to the warm melted butter. This will also help the flavours come together and will help the butter cool down.
Filling the bread
- Once the dough has completed the first proofing, roll it in the shape of a log and divide it in to 4 parts.
- Roll one of the dough ball in to a circle of 5 to 6 inches. Transfer this circle to the parchment paper. Doing this is important as it will be difficult to transfer the "shaped" bread later.
- Spread a heaping spoonful of the filling on the circle completely. Now roll the second dough ball in a similar circle and place it on top of the first one.
- Again, spread a heaping spoonful of the filling. Roll the third circle and repeat the filling.
- For the last dough ball, make the final circle and place it on the top of the 3 circles. Save some filling for the final brushing once the bread is out of the oven.
Shaping the Star Bread
- Once all the layers are in place, get hold of a cookie cutter that is 1 or 1.5 inches in diameter and make an "impression" at the center of the layers.
- Make 4 sections of the circle and then, 3 cuts or 4 petals in each section. Make petal pairs of adjacent petals.
- In one pair, twist one petal in anticlockwise direction twice and the other petal in the clockwise direction, twice. Join the two petals in to one by pinching them together at the tip.
- Repeat the same for all petal pairs to achieve the final star shape. Let this rest for 10 minutes.
- After 10 minutes, preheat the oven for 10 minutes at 180°C. That means, the dough will get 20 minutes in all for the second proofing.
- Bake for 25 minutes at 180°C with both rods to get a nice toasty and crispy bread. If you prefer soft bread, bake for 20 minutes.
- Once out of the oven, brush with the remaining butter-coriander-garlic mixture so that the bread softens over time. Let it rest for 10 minutes. Serve warm.
Notes
Use the same dough recipe and make a Nutella Star Bread by using Nutella as the filling. Spread Nutella straight from the jar using a spoon in between the layers. I made one last week and it looked like this.
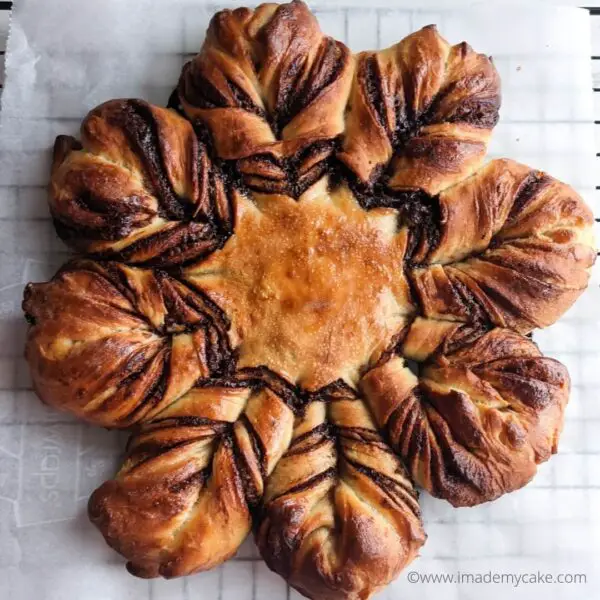
Sprinkle it with some powdered sugar and serve hot.
This bread is best served warm on the day it is baked. Though it does have a shelf life of up to 2 days, it is not that fresh on the second and third day. Just the same way stale bread tastes. This star bread is a lovely pull out bread full of flavours.
What’s best? You can use the dough recipe as a base recipe and keep changing the fillings according to your creativity and taste.
Pin this recipe for coming back later!
New to baking? Read these posts first:
Baking 101: Baking Basics for Cakes, Cookies, Cupcakes and Breads


Leave A Comment